Search This Blog

Friday, January 22, 2016

The knitting loom


Since Lilian was a baby, I have tried to get her interested in the things I love to do. She has tried her hand at baking, sewing, music, knitting, growing things,  drawing, designing etc. A few things have struck a chord with her, but music in particular. We do a ton of singing and harmonizing, and she has always been good at it! 

Although we have music in common, I always felt like it would be fun if we could make something with our hands together. She has rejected most of my attempts of encouragement in this area, but this past Christmas I got her a knitting loom and some yarn from Target. She sat with it for 1 1/2 hours straight and she just could not put it down. That is an accomplishment for a kid in this day and age, where everything around you happens fast! I really enjoyed watching her get completely absorbed by her project(a beanie) and seeing the fruits of her labor slowly grow into something to be proud of.  Good for her self esteem, fine motor skills and patience.


Saturday, January 16, 2016

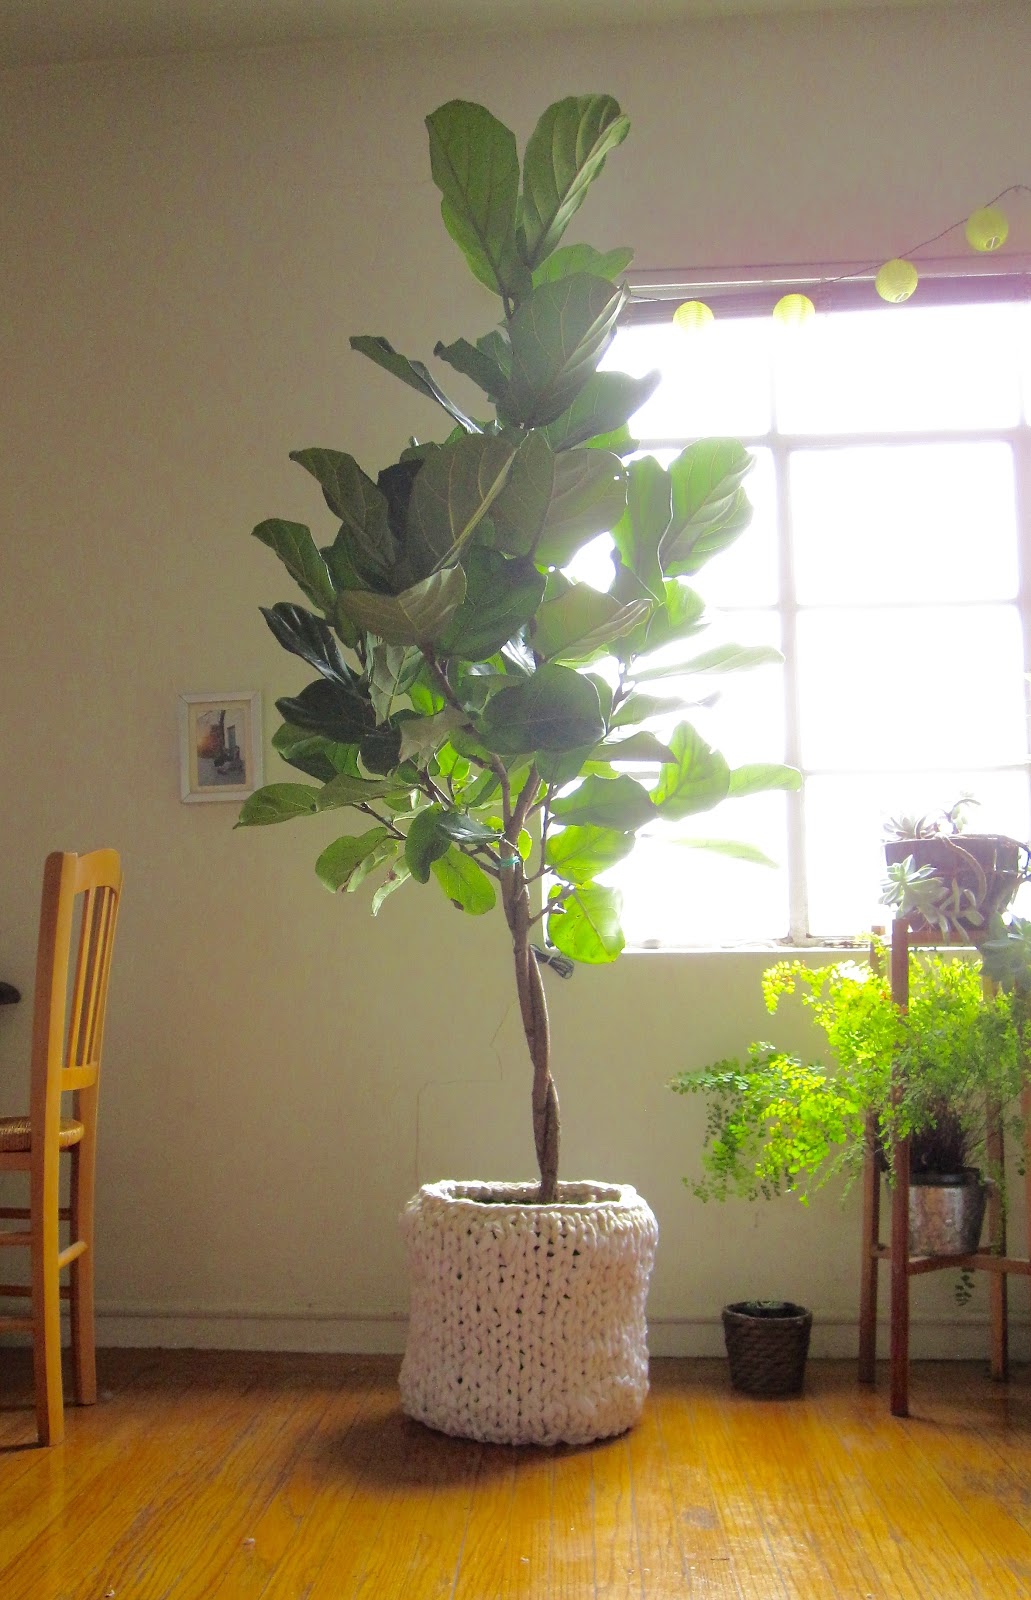
Finger Knitted Pot Cover


The fiddle leaf fig tree that I got for Christmas is finally in presentable condition! 


Just before Christmas, I quit my job. I was working at a restaurant in San Francisco, and they just did not treat their employees in a dignified manner. After one particular incident, I quit. The only problem  is that I had nothing lined up, so here I am with no money, with a child to support and a huge tree in an ugly plastic container. What to do? 

It is surprisingly hard to find a pot big enough, nice looking enough and affordable enough to fit my needs, and so I turn to finger knitting yet again!


I had a lot of muslin scraps laying around, but if you have an old sheet, that will work too.


I also made som smallish, round area rugs. Could possibly fit under the pot, or by the bed to put my feet on in the morning.  


My Etsy shop:


Sunday, January 10, 2016

There is a blurry-photo problem with blogspot. This is how you fix it.

I have been frustrated with the blogger platform. 
I have taken beautiful photos with my camera and uploaded them into my well composed blogpost, only to find the quality of the photo decrease drastically. I have posted my photos anyway, although feeling a bit embarrassed. What else was I supposed to do? From time to time I have tried googling the problem to find a solution but most of them have been outdated and do not apply to the newer version of blogger and/or google +.

I have finally found the solution! I have gone through all on my old blog posts and fixed the image quality and I can now feel truly proud of my work!

To illustrate what the problem looks like:


Above is a photo that has not been fixed.

Below, as you can see, the image is much clearer.


Here's what I did to get the image quality back to what it should be:

Insert the image into your blog post as you normally would. Right below the name of your blog, you will find two buttons that say "compose" and "HTML". Choose HTML. The image will now appear as code. 

In the second row of the code towards the front, it says "/s1600/". In the last row in the middle, it says "/s640/". You need to change the last number to match the top row number. So, your last number should read "/s1600/".

The last number will vary depending on the image size you choose when you insert the image into your blogpost. Sometimes it reads "/s400/", and sometimes "/s320/". It does not matter what the number reads, all that matter is that you change it to "/s1600/". 

It is easier than you think, and you will be very pleased with the result, as your photos will look the way you intended them to!

My Etsy shop:


Sunday, January 3, 2016

Best DIY baking project for kids: Chocolate and oat balls(chokladbollar)


Today Lilian invited her friend over to teach her how to make this fun Swedish treat. There is no oven or knives involved and it's so easy to make that even younger kids can do it without supervision. Plus it requires one to get their hands dirty, which adds another kid friendly aspect to the experience. 

These chocolate and oat balls(chokladbollar) are part of virtually every living Swedes childhood. As a matter of fact, the first documentation of its existence was found in a newspaper ad from 1918. 

So, kick your shoes off and let your kids take over the kitchen for an hour. Enjoy the fruits of your child's labor. Your tastebuds will thank you. Your waistline....not so much!


INGREDIENTS

1 stick (100g) softened butter

2/3 cup (1 1/2 dl) sugar

3 tbsp unsweetened cocoa powder

1 tsp vanilla extract

1 tbsp cold strong coffee

1 tbsp cream

a pinch of salt

2 cups (5 dl) quick oats

unsweetened shredded coconut
or
Swedish pearl sugar


INSTRUCTIONS

Mix butter, sugar and cocoa powder together with your hands or in a stand mixer. Add wet ingredients and salt. Add oats and mix well. You might have to add a little bit more coffee or cream, but the consistency should be drier than you would expect. Sprinkle shredded coconut onto a plate. Make Swedish meatball sized balls and roll them in the coconut. Transfer to another plate. Let the chocolate balls rest in the fridge for 30 min before enjoying. If you have some left over, you can freeze them - they can be eaten right out of the freezer.

Tip: A good way to test if your chocolate balls need more liquid is to see how well the coconut sticks to them. If you roll them with light pressure and the coconut does not stick, you need more liquid. Be careful not to add too much.


Happy munching!


My Etsy shop:


Friday, January 1, 2016

Out with the old, in with the new!


At 11.45 pm on New Years Eve, Lilian exclaimed, "It's out!".

 Out with the old,
 in with the new.

Quite literally.

Happy New Year to all of you!