Search This Blog

Sunday, November 29, 2015

Here is how you brew your own Swedish glogg with ingredients found in the US.


It is first Sunday of Advent. I wake up this morning and go outside to water my plants. The water feels icy cold on my fingers and I have decided that I need to start a new batch of Dunderglögg. 

Glögg is that Swedish spiced wine that you heat up and drink on cold winter days to warm you up from the inside and out. Here in the Bay Area we rarely have to worry about getting cold to the core, but you will find that this steamy holiday spiced libation doesn't need an excuse to be consumed. It is quite delicious and will be of great aid if you are having trouble getting in the spirit. 

Below you will find a recipe that I have adapted from the (in Sweden) famous "Två Dagars Dunderglögg" recipe. The reason I have tweaked the recipe is because the main ingredient - svagdricka - is impossible to find. At least in this part of the US. If you have an IKEA store anywhere close you can find my substitute, julmust, there. 

The recipe is very simple but very gratifying when you in 3-6 weeks, will be able to reap the fruits of your labor. The wine can be enjoyed in just a few weeks but will be even better next year, if you have some left that is...


MARIA'S DUNDERGLÖGG
(tweaked from "Två Dagars" recipe)

10 bottles (5 liters) of IKEA's Julmust

 2 packets(a little less) of active dry yeast (12g)

1 pound potatoes (about 1 1/2 russet baking potatoes)

4 inches of fresh ginger root

3 3/4 pounds sugar(almost a whole packet)

20g(0.7 oz) whole cardamom seeds

11g(0.4 oz) whole cloves

1 cinnamon stick

250 - 500g(1/2-1 lb) raisins


EQUIPMENT:

1 bucket or vessel - 3 gallon capacity

Plastic wrap

( OPTIONAL) Plastic pliable tubing. I found mine at the pet store. 
Intended for aquarium use about 1/4 inch diameter.

Perfectly clean bottles of your choice


DIRECTIONS:

Peel and slice potatoes and ginger root. 
Dissolve the yeast in a small amount of julmust in a bucket or bowl. 
Add the rest of the julmust and all other ingredients.
Mix well.
Cover the bucket or bowl with plastic wrap and poke a few holes in it.
Let sit in room temperature for 3-6 weeks without stirring. It is important to not touch the mixture during this time, as you will disturb the brewing process. 


After 3-6 weeks, very carefully bottle the wine using your tube. Stick one end into the bucket, but keep the end close to the surface. You do not want any of the sediment and lees to be transferred into the bottle and cloud your beautiful glögg. Suck carefully on the other end of the tube until the glögg comes through. Stick the end you just sucked, into a bottle and fill it up.

Heres a link on how to do it:
http://cloudberryandmoss.blogspot.com/2016/02/bottling.html

NOTE:
If you don't have a tube, don't worry! You can bottle your glögg by any method you fancy - just make sure you don't get the sediment into your bottles.


HOW TO PREPARE:

Coarsly chop almonds and mix with raisins.

Pour desired amount of glögg into a sauce pan and carefully heat it. You do NOT want it to simmer or boil, or you will burn off the alcohol. 

Pour the glögg into a mug and add a small amount of the almond and raisin mix. Enjoy just on its own, or with a slice of banana- or gingerbread.  


My Etsy shop:


Monday, November 23, 2015

The Pirate Bag


This year for Halloween, Lilian wanted to be a pirate. Specifically the "girl pirate"(Penelope Cruz' character) in "Pirates Of The Caribbean". It was a fairly easy costume to make. Especially compared to the Tim Burton "Alice In Wonderland" dress from last year that I slaved and swore over for a week. This one was done in a couple of evenings! I made some bling out of polymer clay and painted it gold, a super easy peasant blouse in cotton voile and some accessories for a cheapo hat from Walgreens. The hands down coolest piece of the whole outfit had to be the pirate bag, though.


On a trip to discount fabrics in Berkeley, I found a super soft and distressed looking piece of leather for $13. Thin and soft enough to cut with scissors. I created a super simple design with just three pieces of leather, and a strap. There was even enough leather left to make one more bag, if I were to be so inclined! I stitched it together in a rustic looking way, with the seams showing, and attached the strap made with two pieces of leather glued together using leather glue. I punched some holes in the strap and used an old shoe buckle for adjusting the length.


Lilian ended up loving it, and it even doubled as a trick-or-treat bag for the loot of the evening. I think this bag has done its duty in pirate adventures, and will have to live out the rest of its days as a handbag for me. 

Cheese And Charcuterie


Lilian had the best idea for dinner tonight: cheese and charcuterie. We went to Trader Joe's and found  a delectable assortment of Italian cold cuts and a big hunk of Saint André cheese. We picked one of the brave tomatoes still dangling from the vines in our yard and added my homemade goat cheese and some grapes. There you go: instant feast!


Lilian's favorite was the capocollo and I gobbled up all the prosciutto...
In a couple of days she will be off to Hawaii with her dad for a week. I will miss that lovely child and her bright ideas!

C'mon over to my etsy shop and have a look:
www.etsy.com/shop/cloudberryandmoss

Wednesday, November 18, 2015

After Fair Replenishing


Last weekend, I had a fair. I packed all my stuff up, unpacked my stuff at the venue, packed it up again, and then finally unpacked it when I got back home. Doing fairs is A LOT of work, both before and after. Replenishing is what I have been doing since the weekend. Endless variations of hoops!

Tuesday, November 10, 2015

A Logo At Last

Ahhh....I finally got around to making a logo for my company. I am quite pleased with the result, if I may say so myself!

I sent it off to have it made in to a stamp for my gift boxes and bags. Can't wait to get it and start stamping away!cgfh

Monday, November 9, 2015

How I Made A Fancy Finger Knitted Silk Scarf


A few years ago I did a job as a pattern maker for a clothing collection. I showed some samples of my finger knitting to the designer, who in turn contracted me for some of the knitwear part. I ended up using scraps from the collection to finger knit a stole, shawl and some fingerless gloves. Today, I dug up some old scraps and decided to guide you all through the process of making a fancy neck warmer.


The first thing you want to do is make sure you have enough fabric for your project. The neck warmer will be pretty heavy.
Cut the fabric into 2 inch strips and sew them together into a loooong ribbon. If you run out, you can add ribbon as you go.


Make a loop at the end of the ribbon and fold fabric in half lengthwise as you go.


Keep making loops until you have a length that reaches around your neck, and a little bit more. Start knitting with your fingers, making sure that the raw edges are hidden as much as possible.


Drop the stitches onto your thumb. When your thumb gets full, pull it out and pick up the last two stitches in the row. Keep going back and forth, knitting one row purl, one row knit. When you have about 4 to 5 inches width, cast off.


Secure ends by sewing them to the backside of the neck warmer. 


Sew on 2 ribbons of choice in place of the ends.


And your fancy finger knitted neck warmer is finished!


To tie the scarf around your neck, simply pull the ribbons(one at a time) through two different spots of the loosely knitted fabric. Tie into a bow.


Take a look at my etsy shop:


Wednesday, November 4, 2015

Dyeing Black: A Happy Accident!


fallen oak leaves
A quiet and unassuming rainstorm tiptoed through this weekend. As we are counting down for the mother of rain seasons that we have been promised here in California, this little teaser at least left us with that fresh smell of leaves and earth that I have been longing for.


natural dye fabric acorns
When I left the house in a hurry on Friday, I forgot to take down my dyed fabric that I had left out to dry. It was a piece of piggy pink cotton gauze that I had soaked in green tea, then left in an iron bath. I was quite pleased with the mild, warm gray that I was left with and when I came back on Monday morning it still looked ok although it had gotten tangled in the branches of the old oak tree. 


natural dye acorn stain


At a closer look I saw that some oak leaves and acorns had gotten stuck on the fabric, and when I brushed them off they had left dark, almost black, stains. I was disappointed at first, but then I had an idea.


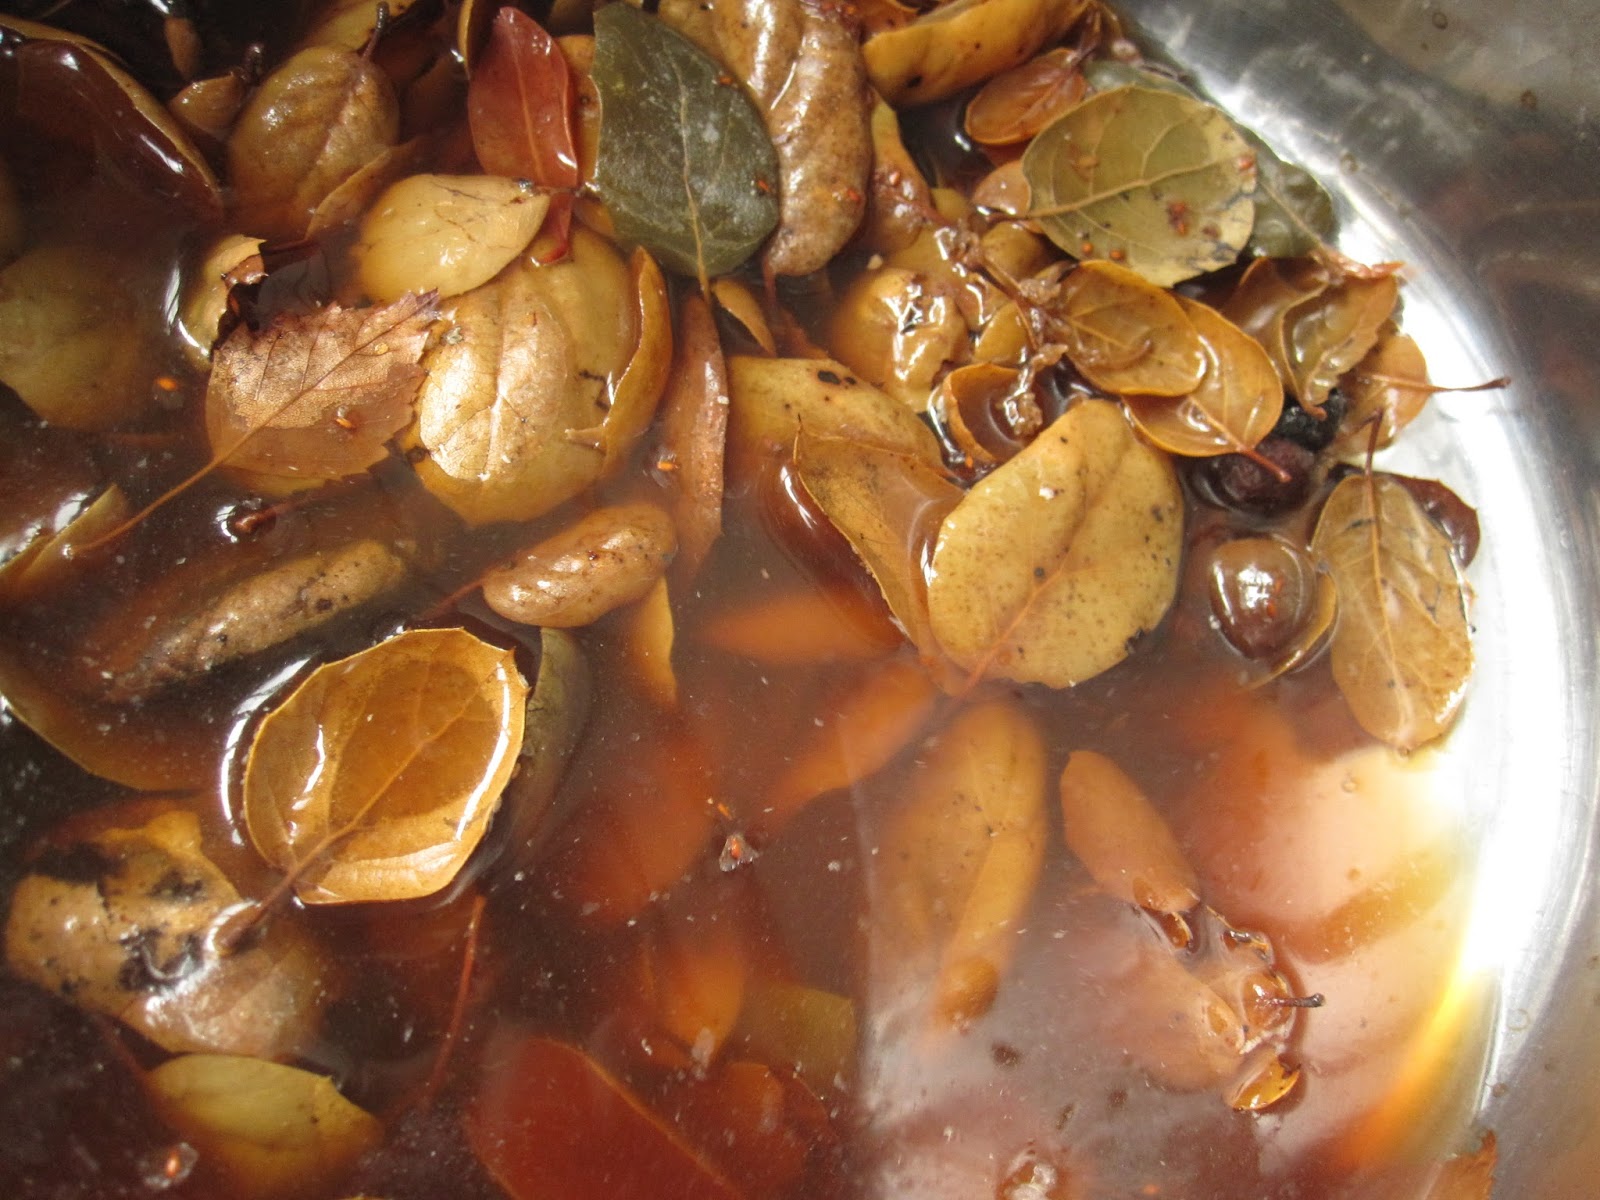
acorn and leaves dye bath


I had heard that gall nuts, acorns and even oak leaves can be good dye stuff. I was still surprised with the striking chemical reaction with green tea and iron! I collected some leaves and acorns and boiled them for 20 min or so, then I strained the mixture and dunked the fabric in it. 


Black cotton gauze acorn dye


Lo and behold, this is my fabric after 10 min of soaking!

I will leave my fabric in this concoction over night. Crossing my fingers that the dye will stick...


acorn dye cotton dark grey


After a day of soaking and a couple of baths to rinse off the excess dye, this is the color of the fabric. I will definitely be dyeing with oak and acorns again!

Monday, November 2, 2015

Luxurious Facecream For My Sister

handmade face cream


My sister is spending some time at my brother's house is Spain. It is a very, very old house at the foot of the Basque mountains in a tiny little village of seven houses or so. She is writing, working, riding horses and lighting fires in the fireplace when it gets cold and dark. I only see her once a year when Lilian and I go back to Sweden. I miss her terribly in between. I wish I could go there right now, sit in front of the fire with her and talk and drink gallons of tea.

Today I made an extra luxurious face cream especially for her. It smells of vanilla, rose and cardamom, and contains oils with extra fine properties - rosehip seed- and sacha inchi seed oil, both cold pressed and organic. There are no preservatives except natural vitamin E oil, so she will have to store it in the refrigerator. 

My sister deserves the best this world has to offer, and this is some of it.